Pages

Showing posts with label homeschool. Show all posts

Friday, September 2, 2011

What they used to eat: Quick Homeschool History Lesson

Image by pzrservices
 
This is an exerpt from Foodtimeline.org's webpage on school lunches in the 20th century. You can find more menu ideas at the website. These are examples of what kids used to eat in the 1920s. Try to make some for your family.

[1905] Some of Margaret's school luncheons
  1. "Two Boston brown bread cream cheese, and nut sandwiches, and two white bread and jam; a little round cake; a pear.
  2. Two chopped ham sandwiches, two with whole wheat bread an peanut-butter; a piece of gingerbread; a peach.
  3. Two whole wheat-bread and chopped egg sandwiches with French dressing; two crackers spread with jam; three thin slices of cold meat, salted; a cup custard; and apple.
  4. Two whole wheat sandwiches spread with chopped celery and French dressing, two of white bread and sardines; three gingersnaps; three figs.
  5. Three sandwiches of white bread filled with cooked oysters, chopped fine, one of whole wheat with orange marmelade; a few pieces of celery, salted, a spice cake; a handful of nuts.
  6. Four sandwiches, two of minced chicken moistened with cream, two of whole wheat and chopped olives; a little jar of apple-sauce; gingerbread.
  7. Two date sandwiches, two of chopped cold meat; sugar cookies; three olives; and orange.
  8. Two fig sandwiches, two whole wheat with chopped celery and French dressing; a devilled egg; a little scalloped cake; an apple.
  9. Three lettuce sandwiches, one with brown sugar and butter; three tiny sweet pickles; ginger cookies; fresh plums."

Homeschool Home Economics Craft Lesson Plan : Making a Bag


Learn how to make a bag with this sewing lesson. This is a great tutorial for homeschoolers to practce their manual skills and develop useful sewing techniques.

These instructions are great for beginners.

Homeschool Chemistry Lesson Plan ~ Make your own soap

Flickr Image by A*Kang

A great way to plan a lesson for home economics and chemistry is making soap. Students will use chemicals that react with fats and oils, through a process called saponification, to create real soap.

This project requires adult supervision and will require adequate protection for safety reasons.

You will need:

16 ounces of vegetable shortening
2 ounces of lye
6 ounces of water
Long Gloves
Eye Goggles
Napkins and towels for clean up
Spatula
Food scale or measuring cup
Vinegar to neutralize the lye
Storage pans
Soap mold
Stick blender

1. Start by weighing your 6 ounces of water and placing it in a large pan
2. Weight out the lye and slowly add it to the water while stirring until completely dissolved.
3. Rinse out the measuring cup with vinegar to remove any remaining lye particles.
4. Measure out the 16 ounces of vegetable shortening and place it into the lye solution.
5. Take your stick blender and blend the mixture until it gets thick; taking short breaks in between blends.
6. Once it has become thick, pour the mixture into a soap mold and let it sit for 24 hours.
7. Clean up your area with vinegar solution.
8. After 24 hours, the soap has hardened and you can now take the soap out of the mold.
9. Let the soap sit for about 2 weeks to allow it to dry and become more stable.
10. The soap is now ready to use.

Now it is time for your student to document their observations throughout the soap making process. Saponfication began when the oils mixed with the lye mixture and ended when the soap was fully hardened and ready to use. This is because the oils reacted with the lye in order for the oil and water to mix, which usually does not happen. Ask your student to complete the following questions in order to complete the activity.

  • What special ingredients were used in this activity that you hadn't used before? 
  • What happens when you normally mix oil and water together? What made it different this time?
  • What causes the soap to harden?
  • What do you think each ingredient you used does to the soap?
  • What would you do differently next time to make the soap better?
  • What do you think would happen if you took out one ingredient out of the soap? Lye? Vegetable shortening? Water?


Thursday, September 1, 2011

Cooking from the Past: FREE Homeschool History Lesson Plan Grades 5-9

Here is the lesson plan for the "Food from the Past" activity in the previous blog post.

This lesson will help students get a historical understanding of home economics and the resources available back then for families to make meals.

CLICK HERE FOR THE FULL LESSON PLAN.

Tuesday, August 9, 2011

FREE Printable Math Homeschooling Worksheet for Kindergarten & Preschool: Counting Objects

Free homeschooling math worksheet for elementary grade students. This sheet is printable and can be fully viewed by clicking on the image.

Exercise includes activities on counting. Students will be asked questions based on the picture at the top of the page.This worksheet is suited for students aged 2-6..

Friday, August 5, 2011

FREE Science Homeschool Lesson Plan for Middle School Students

Science lesson plan focuses on basic investigation and observation of garden flowers in the fall. Prepare your science notebooks for this lesson because it is full of projects and activities. This lesson is suited for students aged 9-12, with basic vocabulary skills.

Download a full version of this lesson here. (PDF) or (DOC).

Wednesday, August 3, 2011

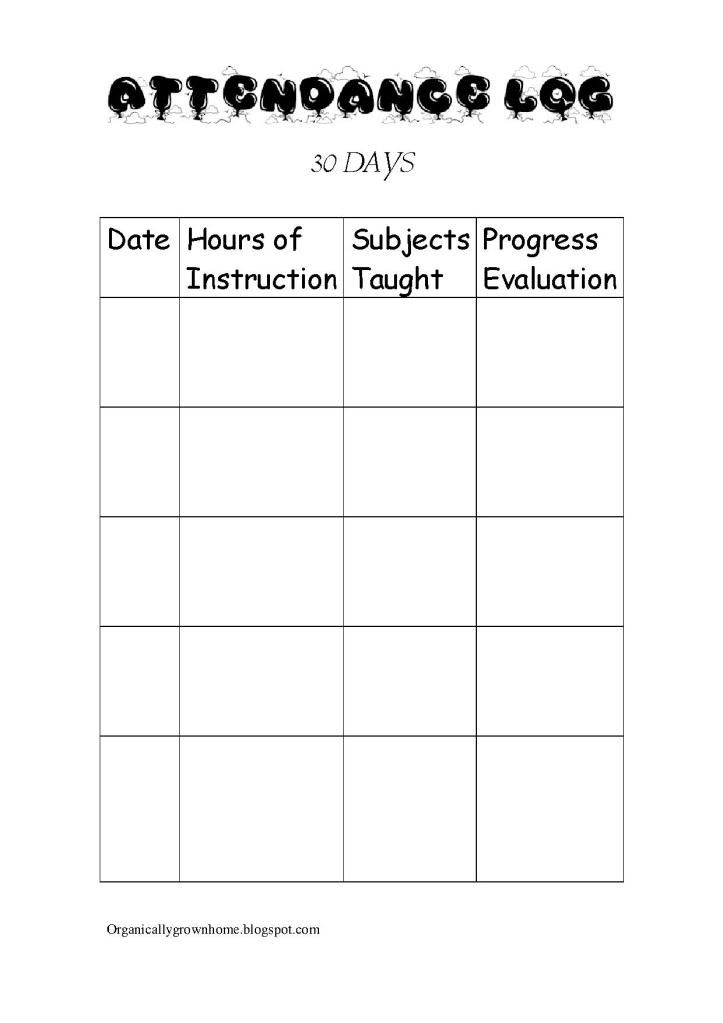
FREE Homeschooling Attendance Sheet


If your state has a minimum attendance requirements, you will need to report an attendance log to your evaluator to show proof of compliance. This log is for 30 days, you can also print them out as you need them.

The first column is for the date, you will need to document each day of instruction adding up to the required amount of days in each year. The second column is for the amount of hours you instructed the homeschool day, many states require a minimum amount of school hours within a year. The third column is used to list the subjects you taught for the day. Everyday doesn't have to be the same and some days may have less subjects than others but it is helpful to show your evaluator that each subject has been consistently taught. The fourth column can be used to document your child's progress. It could mean simply writing a list of some of things they learned through the lesson or a sentence regarding an accomplishment they previous had difficulty in.

Download the full attendance log here (PDF) or (DOC).

Tuesday, August 2, 2011

State By State Homeschooling Laws : HSLDA


Before starting your homeschool journey, you will need to comply with state laws regarding homeschooling. When seeking advice, it's best to call your state's Department of Education or your local county superintendent. However, HLSDA offers a good state by state guide to the laws based on state statutes.


For more information go to: http://www.hslda.org/laws/